

I thought I would take some time here and there to share some tutorials and techniques that I’ve learned and shared over time.
I’ve shared this post in a couple of forums and blogs, but I thought it would be fun to share it here. You can find the original post HERE.
Have you ever wanted to use more than one of those gorgeous background papers you have in a kit but don’t want the harsh line of stacking them? Do you have two or more papers that you think would work beautifully together? Blending papers for a background is something I do fairly often and there are actually several ways you can go about it.
One way is to use the gradient tool, which is what this tutorial is all about. It’s a fairly quick and simple way to achieve and beautiful new look.
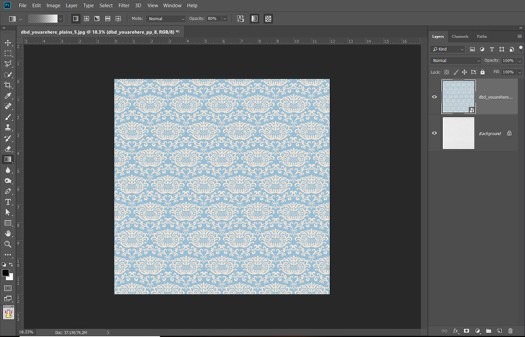
Start by layering the the two papers you want to blend:
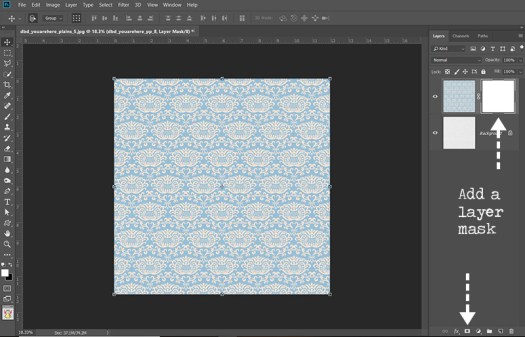
With the top paper layer selected, click the layer mask icon:
Making sure the mask is selected, choose the gradient tool. Drag your gradient line from the top edge of the image to the bottom, or bottom to top, or side to side, or even diagonally, depending on the way you want the gradient to go. You can play around with different directions to see which effect you like best. You can also start in the anywhere on the paper to move the gradient closer to one edge or corner.
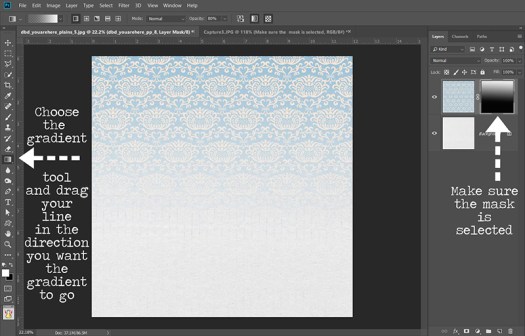
For this one, I first went from bottom to top and then moved to the center of the paper and pulled up again. And just like that, your papers are beautifully blended!
You can also play around with different gradients to get different blending effects.

If you wish, you can add more paper layers and blend them as well.
Typically, I will then take it a step further in PS and adjust the blending options (click the fx button at the bottom and choose blending options), especially on a woodgrain to bring out the texture a bit more. Adjusting the underlying layer just adds a little more blending. You can hold the alt key while sliding to separate the pieces of the triangle for different blending effects.

And here is my final page using this technique:

Super fun look to achieve and really easy peasy!! Hope this is helpful! I’ll be back to share some more tips and tricks next week 🙂 Thanks for stopping by!!
